Creating cost models
There are three ways to create a new cost model:
- Create a cost model from scratch.
- Create a cost model from a cost model database.
- Create a cost model by amending a previously created and saved cost model.

Creating a cost model from scratch
To create a cost model from scratch, select the New cost model from scratch
option at start up.
A file for cost model now needs to be created and the Save the cost model
dialog is displayed. Enter a
name for the cost model and save the cost model normally in your Documents/My CostAdviser/My cost
models
folder.
A dialog screen comprising a series of basic questions will now appear. Enter or select the appropriate answers.
- Select a building from the list that closest resembles the one for which you wish to create a cost model
- You can also search the buildings to save looking through the entire list. Enter a key word or words and
press the keyboard 'Enter' key. A list of matching buildings will be displayed. (Clicking the adjacent refresh
button will reset the buildings to the default list).
- Enter the gross internal floor area over all floors of the building.
- Enter the footprint area. More often than not this is the ground floor area. Do not worry about being too exact
at this stage; the model can be easily refined later.
- If you know the area of the site, enter the figure. If you don't know it, enter the approximate site area
compared to the footprint area of the building. Again, do not worry about being too exact at this stage; the model
can be easily refined later.
- Select the rough shape of the building from the drop-down list, i.e. whether it is roughly square, rectangular,
long and thin on plan, etc
- Select the specification level for the proposed building from the drop-down list. The effect of the level on
default normal/typical costs are as follows:
- Economical: -10%
- Typical/normal: 0%
- Better than typical/normal: +10%
- High spec: +20%
- Select the ease of access to the site access or complexity of the site set up. For example, if the site is in a
remote location, you may select 'Difficult/more complex', or a similar factor if the site is in a city centre with
limited site space, more complex site set-up and more complex material delivery arrangements.
- Enter the date when the construction works are due to start.
- A guide construction period will be calculated as the cost model is being built and incorporated into the
cost model automatically. It can be viewed and amended if necessary in the 'base data' page for the completed
cost model.
- Select the UK location applicable to the proposed development location from the right-hand drop-down list.
Clicking the link will take you to the webpage displaying a UK map and the latest location factors.
- Select the cost plan rate rounding required for the cost model from the drop-down list. Pricing rates to the
nearest pence can perhaps give a false sense of accuracy particularly at early cost advice stage. Wouldn't it be
better to show the all-in element rate for external walls as £250 per m2 rather than £247.56
per m2? Similarly, cost plan rates may be better used and displayed to the nearest pound, which is the
default setting.
- You have a choice of pricing methods. You can use CostAdviser's built-in default UK prices for your cost model,
of if you wish to use your own pricing, select the
Using my own pricing
option. For this latter option, enter a building cost per m2 of gross internal floor area (substructure to services) excluding preliminaries and main contractor's profit and overheads. CostAdviser will use this pricing to price all the elements.
- Click the toolbar 'Save' button and you have now created an elemental cost model for your proposed building, the group summary cost details of which are displayed on the home page.

A dialog box will appear asking if you want to fine tune the starter cost model and examine default selections before completing.
If you answer 'No', CostAdviser will now build your cost model including default allowances for risk.
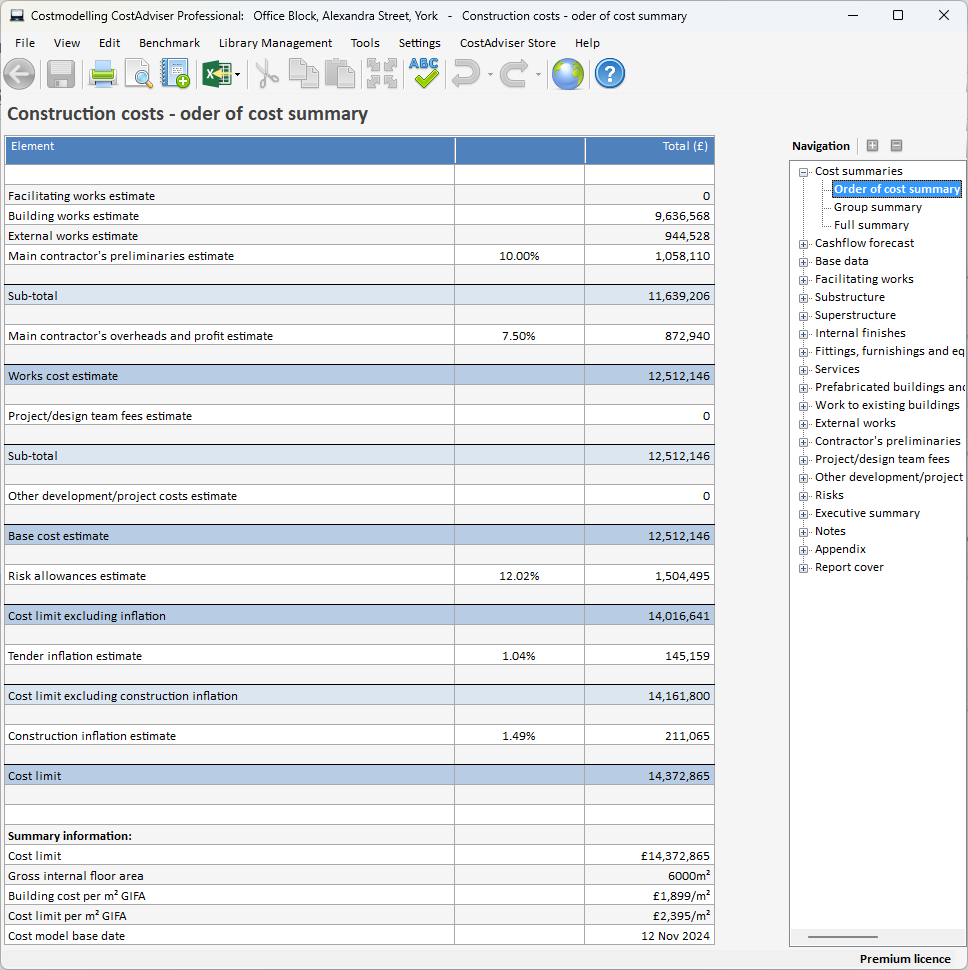
You now have a complete elemental unit rate cost model (Order of Cost Estimate). The construction group elemental cost summary page is displayed indicating the group elemental cost details of your cost model.
You should examine each element of the starter cost model and if necessary amend any details as appropriate or required for your cost model. Remember the initial details are general starter details - they should be checked.
If you answer 'Yes', you will now be presented with a series of dialog boxes where you will be able to select the appropriate element unit quantities (only 4 required to be selected - the program will do the rest) and the appropriate element unit rate for each element. Each dialog box will display a range of figures and indicate typical/average figures for that element. Guidance notes will help explain the range and help you make your selection.

Make a selection for each step. You can go backwards and forwards through the steps in case you need to review previous selections. When you have completed the final step, click the 'Finish' button.
You now have a complete elemental unit rate cost model (Order of Cost Estimate). The construction group elemental cost summary page is displayed indicating the group elemental cost details of your cost model. Default allowances for risk will have been included and you should check and amend these as appropriate or required for your cost model.
As the design progresses and/or more information is or becomes available, you can refine and build up the cost
model, element by element by replacing the all-in element unit rates in each cost plan with cost plan items
according to the information available. See the Cost model cost plans
section for more details on how to do this.
Creating a cost model from a cost model database
To create a cost model from a cost model database, select the create cost model from database option at start up.
Select the required database from the list, and then click the Open
button.
You will then be required to save the cost model before proceeding further. Follow the dialogs, give the cost
model a unique name and save it in your My Documents/My CostAdviser/My Cost Models
folder.
You will then be taken directly to the base data page. Complete the base data as described in the
Base Data
section and navigate back to the Home page. You have now
created a cost model based on the existing cost model database adjusted by the inputted base data information.
The cost model will comprise element quantities, element rates and cost plan items. Each of these items needs to be examined, accepted, or amended as required. See the appropriate help sections for more details of these facilities.
Finally, to complete your cost model you will have to make your inclusion for risk. See the Risk
section for more information.
For information about creating a cost model database, see the Creating
Databases
section.
Creating a cost model by amending a previously created and saved cost model
To create a new cost model from an existing one, select the open existing cost model option at start up.
Select the required cost model from the list displayed in the dialog box, and then click the Open
button.
Save the model as a new cost model with a new file name using the Save as....
menu routine. It is
important that you do this as soon as the existing cost model file is open to prevent any changes being made to this
existing cost model.
Carry out the required cost modelling alterations.
Use this method of creating a new cost model when a cost model created previously is similar to the new one and obviously provides a suitable basis.
Creating a life cycle cost model
Life cycle (or whole life) cost models are created using the construction cost planning cost model as its base. In order to create a life cycle cost model you must first create a construction cost planning cost model first as described above.
Once you have created the construction cost planning cost model, open that model up in Costmodelling CostAdviser.
As soon as the cost model is loaded, from the File
menu, click the Create Life Cycle Cost Model
menu item.
A dialog box will appear requiring you to save the new life cycle cost model as a new file.
Costmodelling CostAdviser will now create a whole life cost model comprising construction, renewal and maintenance costs. The program will populate renewal and maintain cost plans with data extracted from the construct cost plans.
The renewal and maintenance costs are designed to be a starter pack only. You will need to look at each renewal and maintenance cost plan and adapt the information as appropriate for the specification of your proposed building. However, you have a useful guide to how the costs are put together.
For more information about renewal and maintain cost plans see the 'Cost Plans' section.
Tutorial
For a step-by-step guide to creating cost models it is worth following the examples in the 'Tutorial' section.